Sunday, September 09, 2007

40+ FREE Windows Apps

Security:

1. Open Antivirus:
OpenAntiVirus is not another virus scanner to put on a computer! OpenAntiVirus is a platform for people seriously interested in anti-virus research, network security and computer security to communicate with each other, to develop solutions for various security problems, and to develop new security technologies.

2. Truecrypt:
Free open-source disk encryption software for Windows Vista/XP/2000 and Linux. Creates a virtual encrypted disk within a file and mounts it as a real disk. Encrypts an entire hard disk partition or a storage device such as USB flash drive. Encryption is automatic, real-time (on-the-fly) and transparent.

3. ClamAV:
ClamAV application is primarily for unix based systems but now a windows version is available. This version needs a emulation layer like CygWin

4. RogueScanner:
RogueScanner is an open source vulnerability management tool that is used to gain greater network visibility. This enables you to quickly identify and remove rogue wireless devices that may provide back door access to your critical data and infrastructure.

5. Keepass:
KeePass is a free/open-source password manager or safe which helps you to manage your passwords in a secure way. You can put all your passwords in one database, which is locked with one master key or a key-disk. So you only have to remember one single master password or insert the key-disk to unlock the whole database.

6. Clipperz:
Clipperz is a free and anonymous online password manager. Local encryption within the browser guarantees that no one except you can read your data. Nothing to install. (earlier review)

7. SoftPerfect Personal Firewall:
The SoftPerfect Personal Firewall is a free network firewall designed to protect your PC against attacks from the Internet or via a local area network. SoftPerfect Personal Firewall offers customizable security using user-defined rules for packet filtering. It works at a low level and also allows you to create rules based on non-IP protocols such as ARP.

File Transfer / Sharing:

1. WinSCP:
WinSCP is an open source free SFTP client and FTP client for Windows. Legacy SCP protocol is also supported. Its main function is safe copying of files between a local and a remote computer.

2. PuTTy:
PuTTY is a free implementation of Telnet and SSH for Win32 and Unix platforms, along with an xterm terminal emulator.

3. ShowMyPC:
ShowMyPC is now a Community for Remote Support providers. Providing tools for Instant Support to Service Providers and Users. It started as an open source Desktop Sharing and Remote PC access project, an alternative to subscription based sites like WebEx or Gotomypc.

4. Ares:
Ares is a free open source file sharing program that enables users to share any digital file including images, audio, video, software, documents, etc.

Multi Media

1. Media Player Classic:
Media Player Classic (MPC) is a compact free software media player for Microsoft Windows. The application has a similar look and feel to the old light-weight Windows Media Player 6.4. Underneath, however, it is a completely different application which has all the options and features one might expect from a modern media player.

2. Media Coder:
MediaCoder is a free universal batch media transcoder, which nicely integrates most popular audio/video codecs and tools into an all-in-one solution. (earlier review)

3. Hanbrake:
HandBrake is an open-source, GPL-licensed, multiplatform, multithreaded DVD to MPEG-4 converter, available for MacOS X, Linux and Windows.

4. musikCube:
musikCube can be an alternative to iTunes to manage your music collection.

5. popCorn:
popCorn is a desktop-oriented MPEG-1 audio (MP3) and video software capable of playing data streamed directly from the network. Compatibility with existing media servers is provided by the support of the industry standard RTSP protocol.

6. ImgBurn:
ImgBurn is a lightweight CD / DVD / HD DVD / Blu-ray burning application. It supports all windows versions.

7. AVS Disc Creator:
Write your data to CD, DVD and Blu-ray Discs quickly and easily using FREE AVS Disc Creator.

8. DVDStyler:
DVDStyler is a cross-platform DVD authoring application that makes possible for video enthusiasts to create professional-looking DVDs.

9. mp3mymp3:
Record any audio playing on your computer as mp3 or wav file with mp3mymp3 recorder. It can record any sound originating from your computer, it works by recording all audio through your sound card. (earlier review)

10. Youtube Catcher:
Youtube Catcher can download videos from Youtube, Google Video, Myspace Video, Yahoo video Dailymotion Stage6 Veoh. The downloaded videos can be exported to various formats like MPG,AVI, MP4,3GP, 3G2, WMV, PSP, MOV, FLV with the quality you choose. (earlier review)

11. Media Portal:
MediaPortal is an Open Source application ideal for turning your PC / TV into a very advanced Media Center. MediaPortal allows you to listen to your favorite music & radio, watch and store your videos and DVDs, view, schedule and record live TV as a digital video recorder and much much more.

Video Editing Tools

1. Vivia-The Video Editor:
Vivia is a video editing program for Linux and Windows. It provides extremely easy editing of clips and transitions in real-time, along with multi-camera support for editing scenes that were recorded by more than one camera simultaneously.

2. MiNi Video Studio:
MiNI Video Studio is a program for non-linear video editing. It means this application allows creating of a movie from other movies in a way, that the elements of the final movie overlap, creating a series of layers, that can be rendered one by one, or all at once.

3. DVD Flick:
DVD Flick aims to be a simple but at the same time powerful DVD Authoring tool. It can take a number of video files stored on your computer and turn them into a DVD that will play back on your DVD player, Media Center or Home Cinema Set. You can add additional custom audio tracks as well as subtitles of your choice.

4. OpenVIP:
OpenVIP editor. It provides a user-friendly GUI to the core and is based on the timeline concept - you place multimedia files on the timeline, apply filters, transitions…

Image Viewing & manipulation

1. Irfanview:
IrfanView is a very fast, small, compact and innovative FREEWARE graphic viewer for Windows 9x/ME/NT/2000/XP/2003/Vista.

2. Paint.net:
Paint.NET is free image and photo editing software for computers that run Windows. It features an intuitive and innovative user interface with support for layers, unlimited undo, special effects, and a wide variety of useful and powerful tools.

3. XnView:
XnView is a free software to view and convert graphic files, really simple to use. It Support of more than 400 graphics formats.

3D Graphics:

1. Art Of Illusion:
Art of Illusion is a free, open source 3D modelling and rendering studio. It is written entirely in Java, and should be usable on any Java Virtual Machine which is compatible with J2SE 1.4 or later.

2. OpenFX:
OpenFX is an Open-Source 3D modeling, animation and rendering suite. A powerful feature-set includes a full renderer and raytrace engine, NURBS support, kinematics-based animation, morphing, and an extensive plugin API.

Office / Productivity

1. AbiWord:
AbiWord is a open source and fully cross-platform word processor.

2. Launchy:
Launchy is a free windows utility designed to help you forget about your start menu, the icons on your desktop, and even your file manager. Launchy indexes the programs in your start menu and can launch your documents, project files, folders, and bookmarks with just a few keystrokes! (earlier review)

3. Cygwin:
Cygwin is a Linux-like environment for Windows. It consists of two parts: A DLL (cygwin1.dll) which acts as a Linux API emulation layer providing substantial Linux API functionality. A collection of tools which provide Linux look and feel.

4. Pandora Recovery:
Pandora Recovery is a powerful free tool that provides its users an effective way to attempt recovery of permanently deleted files. (earlier review)

5. CCleaner:
CCleaner is a freeware system optimization and privacy tool. It removes unused files from your system - allowing Windows to run faster and freeing up valuable hard disk space. It also cleans traces of your online activities such as your Internet history.

6. Wink:
You can create presentations or screencasts with Wink in just minutes, you can record mouse movements or take screenshots of your application and save them as flash files. (earlier review)

7. Freemind:
FreeMind is a premier free mind-mapping software written in Java. The recent development has hopefully turned it into high productivity tool.

8. jetToolbar:
Despite Microsoft's best intentions, the Start Menu isn't everybody's cup of tea. If you're looking for an alternative way to launch your programs, take a look at jetToolBar. During installation this well-done utility creates 14 default categories, registers shortcuts for many of your applications, and adds bookmarks for recommended Web pages.

9. MyUninstaller:
MyUninstaller is an alternative utility to the standard Add/Remove applet of Windows operating system. It displays the list of all installed application, and allows you to uninstall an application, delete an uninstall entry, and save the list of all installed applications into a text file or HTML file.

10. Flashget:
Flashget is a freeware for downloading files. It uses MHT(Multi-server Hyper-threading Transportation) technique, supports various protocols

11. ZScreen:
ZScreen is an open-source screen capture program that allows for region/window/full-screen screenshots. It can FTP screenshots and put the URL in your clipboard in a single keystroke. It supports automatic custom naming conventions with variables. It can also interface with image editing software.

Web / Development

1. PSPad:
PSPad is a freeware programmer's editor for Microsoft Windows operating systems, useful for people who:

2. HTTrack:
HTTrack is a free and easy-to-use offline browser utility. It allows you to download a World Wide Web site from the Internet to a local directory, building recursively all directories, getting HTML, images, and other files from the server to your computer.

3. NOTEPAD++:
Notepad++ is a free source code editor (and Notepad replacement), which supports several programming languages, running under the MS Windows environment.

Google Pack

I haven't listed any of the programs from Google Pack because most of the users are aware of these. Except one or two all the programs in this pack are must have for anybody, if you havn't downloaded google pack get it from here

Miscellaneous

Virtual Box:
VirtualBox is a family of powerful x86 virtualization products for enterprise as well as home use. Not only is VirtualBox an extremely feature rich, high performance product.

Tags:, , , , , ,

Thursday, September 06, 2007

How to Buy a New Car

How To: 13 Step Method For Buying A Car While Controlling The Sale And The Price

shadycardealer.jpgCommenter Keter posted a completely kick-ass 13 step guide to buying a car while maintaining total and absolute control over the sales process. It was so good we're lifting it and posting it to the front page.

1. Pick the exact make and model of car you want.

2. Call around first anonymously (such as calling from work on your lunch hour), and get prices. Tell them you are calling everybody, and the best deal wins. Write down the prices you are given, and note any difference in packages.

3. Pick the dealership you think you want to do business with based on the results of this phone call. Price should not be the decider -- demeanor and gut feel should be....

4. Go to the dealership you absolutely NEVER want to do business with . Nail down the details on the options -- go for "loaded," then whittle it down to find the approximate prices for each option. Make a detailed list with prices. Mark the options you must have and those can do without.

5. Do your research online and compare your pricing research with others and experts. Set an "ideal price" and an "I can live with it" price for the car you want with all the options you want, and again for the car you want with the minimum options you want. You now have a low and high figure for the car.

6. Go get cash or a a pre-approved car loan for something less than the upper amount. Put the cash or check in a blank sealed envelope. Find out ahead of time how to deal with the pre-approved loan if the negotiated amount is less than the amount on the bank check. You do not want to have to leave the dealership to get a new check for a smaller amount, so try to arrange something in advance for this contingency.

7. Call your insurance carrier and tell them you are buying a new car. Do as much of the paperwork ahead of time as possible and determine the hours they can service you so you can avoid delays or surprises at delivery time. (Any delays benefit the dealer.)

8. Go to the dealer you want to deal with -- on a weekday, in the morning. Get dropped off or, ideally, have a friend or significant other go with you. (It always helps to have a witness.) Bring a sack lunch and drinks with you. You're not leaving or letting your attention wander until you have a car.

9. Find the exact car you want. Use your list...this shows you've done your homework. Don't be surprised if your salesman suddenly has to handle an emergency and hands you off to someone else. This is a good sign that you have the upper hand already.

10. Show them the envelope. Tell them you have cash/a pre-approved loan check, and three chances to get it from you if you can drive out by an exact time (by 3 PM is usually good), all paperwork done, taxes paid, and every other fee under the sun taken care of for less than the amount in the envelope. Do not give any hints about the amount, make them name heir price. If it's way out of sight, don't say anything. Just laugh and head for the door. They'll chase you down and give you a much better number. If they don't, go elsewhere.

11. Read everything. Twice. Have your friend do the same. Line out anything you don't agree to or doesn't apply, initial and date this and have the dealer rep do the same. Do not leave any blank spaces. Count the papers and make sure you get copies of all of them. Ask if there are any programs you need to opt out of to avoid being automatically signed up for them. Do whatever is required to opt out.

12. If at any time they give you attitude or BS, walk out. They will chase you down. Tell them they have only one chance left because they gave you attitude. Now they will deal. If they don't, go elsewhere.

13. Try another city if yours is full of slime balls.

Good luck. I don't buy new, but I helped friends buy using this technique, and it really works...but it works only if you truly are willing to walk away...and then refuse to bend when they try to put you off or change the terms. Stay civil, do not let any emotion in. You are on a mission, Marine!

The same technique works for buying a used car, but tell them that you will not talk price until YOUR mechanic looks over the vehicle and gives you a report on it. Watch how much the squirm. I also learned the basics of car inspection, and perform my own pre-inspections right there on the lot -- 90% of used cars have a defect so serious they don't pass 5 minutes of my inspection! The best one (if any) goes to the mechanic.

Have the mechanic lined up for the time you will be needing the car checked out. I prefer to have my mechanic pick up the car from the dealer directly. The mechanic should be one you have had good experiences with previously. NEVER use a mechanic who is near the dealership. I tell my mechanic "check this car like you would if your 16 year old daughter was going to have to drive it to Alaska and back -- alone."

Go back to the dealer with a list of all defects and an estimate to fix them. Negotiate a price adjustment. In some cases, you may agree to let the dealer do the repairs, BUT specifically put in writing that these repairs will be accepted only after a re-inspection by your mechanic and no crappy used or after-market parts will be used.

Figure on devoting at least a month and looking at 200+ cars to find a good used car.

I've bought three truly excellent used cars this way -- all for less than $5000 -- all required minor repairs prior to delivery, and all lasted more than 100K miles with minimal repair costs afterward.

Celeb Mashups

Friday, August 31, 2007

Resume Advice

How to Write a Resume

Also try: How to Write a Cover Letter

Step 1: Before You Write Your Resume

A great resume can help you get a job interview (Photo by Penny Mathews)
  1. A resume provides an overview of your experience and skills. As such, it is an important tool in any job search.
  2. A resume cannot guarantee you a job offer, but a great resume will help you get an interview. So spending the time to make your resume as good as it can be is a worthwhile investment!
  3. Before you begin constructing a resume, take the time to think about your experience and what type of job you're looking for.
    • If you're re-entering the workforce, you may pick a different format than someone who's been working continuously.
    • A recent college graduate will focus more on educational background than an experienced worker.
    • If you're changing careers, you may opt for a different format than someone who is remaining in his current field.
  4. Take a look at some sample resumes online. Boston College , the Wall Street Journal, Vault.com and the University of Florida have some good examples.

Do Research in Your Industry

  1. The type of job you're applying for will also influence the type of resume you write.
  2. If there's a style of resume often used in your desired field, consider using it yourself.
  3. Look at sample resumes from other people in your industry. Is there a section or format they're using? You might want to include it too!

Step 2: Use these Resume Writing Tips

Be honest as you write your resume (Photo by Steve Woods)
  • Here are a few tips to keep in mind as you write or update your resume:
  1. Be honest.
    • It is better to address any gaps in employment than to try to hide them.
    • Lying on your resume may get you into an interview, but you still have to go through a background and references check to land the job.
    • If you state you can perform a task or operate a program you actually don't know, your lie will be exposed.
  2. Write out everything you want to include on your resume. You can trim it down to one page later.
    • Note: If you have over 10 years of work experience that is important and needs to be included, a resume of two pages is acceptable.
  3. Employers often scan or upload resumes into electronic databases. For this reason, simpler formatting is the better route to take:
    • Try to avoid using tables.
    • Use spaces instead of tabs to separate sections.
    • Also avoid italics, underlining and shadowed text.
  4. On that note, perfumed paper, curlicue fonts, and pretty images are all no-nos. You want your resume to stand out, but not for these reasons!
  5. Use easy-to-read fonts and a clear design to make your resume more appealing.

Step 3: Write Your Resume Objective Statement

OWL Sample Objective Statements
OWL at Purdue University Sample Objective Statements
  1. An objective statement is the first thing listed after your personal information.
  2. The objective statement is a sentence or two that sums up your current career goals.
  3. An objective statement is not always a resume necessity, but it can be a handy summary of what you're looking for in a position.
  4. If you're starting your resume from scratch, write your objective statement first. This can help you decide what information to highlight on your resume, even if you ultimately decide not to include an objective statement.
  5. Do not write a generic objective statement; it is more likely to turn off a prospective employer.
    • Example: My goal is to get a rewarding job that pays well.
  6. Your objective statement should relate to the job you are applying for.
    • Example: An experienced public relations consultant, I now seek a position as an account manager where I can utilize my management skills.
  7. Target this statement to the position you're interested in . This is the first information on the page after your name and address, and it should make the case for you being the perfect person for the job!

Step 4: Choose a Resume Style

Consider your experience and desired job when choosing a resume style (Photo by Chris Chidsey)
  1. There are several types of resumes:
  2. You want to think about your situation and create the best resume for your experience and desired job.
  3. Keep in mind that most recruiters want your resume to show your career progression . Therefore, use a chronological or combination resume unless you are in an exceptional situation. If you have no work history or have worked multiple jobs over a short period of time an unconventional format may show you in a better light.
  4. Most resumes should fit on one page. However, if the information is truly important and necessary, two pages is acceptable.
    • If you have less than 10 years' work experience, you should only need a one page resume.
    • It is better to go onto a second page than to leave out important information, such as if you are creating an academic CV and want to include your published works.
    • Do not go onto a second page for unimportant information, like personal hobbies, out-of-date skills and achievements from over 10 years ago.
  5. Pick the the type of resume that is best suited to you and your goals.
    • If you're unsure what type that is, try writing your resume in two or more formats, then ask for feedback from friends or relatives. An objective eye may tell you which format is best for you!

Chronological Resumes

About.com's Sample Chronological Resume
About.com's Sample Chronological Resume, top section
  1. This is the most common type of resume.
  2. It lists your work and educational history chronologically.
  3. The general layout is as follows:
    • Header with personal information (Name, Address, Phone numbers, Email).
    • Objective statement (if included).
    • Career and skills summary (if included).
    • Reverse chronological career listings (include employer names and locations).
    • Educational background (School name, location and your GPA).
      • (Recent graduates may place education ahead of their career listings).
  4. List what you achieved in different positions, not what your job responsibilities were.
  5. Quantify your on the job accomplishments .
    • Instead of writing that you improved customer relations, state that customer satisfaction increased 40% while you were in charge.
    • Explain the size of the company you worked for, the number of people you supervised, and the size of any budgets you managed.
  6. Condense unimportant information. There is no need to list every job you've had since college. You can include a quick summary of those early positions in a section labeled "early career."
    • If you were recognized or honored for work you accomplished, by all means include that- if it is relevant to the job you're applying for now!
  7. If you've been in the workforce for several years, your educational background becomes less important. Trimming this section to the basics will leave more room for other information.

Skills Resumes

OWL at Purdue University Sample Skills Resume
OWL at Purdue University Sample Skills Resume, skills section
  1. Skills resumes allow you to group your work history by skills , not by dates or places of employment.
  2. This kind of resume lets you highlight the skills you think are most important; your resume can lead with the most relevant experience you have instead of the most recent.
  3. This resume style can be particularly useful for someone who is re-entering the workforce, or entering the workforce for the first time, and does not have recent work experience.
  4. It is also well-suited if you are making a big career change, as you can list skills relevant to the job you're applying for.
  5. Write a clear objective statement; this can explain how your skills relate to the job you now seek.
  6. Also make sure to include a career summary; this can explain why you are changing careers or re-entering the workforce.
  7. The general layout is as follows:
    • Header with personal information (Name, Address, Phone numbers, Email).
    • Objective statement.
    • Career summary.
    • Skills groupings.
    • List of places of employment (include employer names, locations, and dates of employment).
    • Educational background (School name, location and your GPA).
      • (Recent graduates may place education ahead of their skill groupings).

Functional Resumes

About.com's Sample Functional Resume
About.com's Sample Functional Resume, top section
  1. A functional resume is very close in style to a skill-based resume, and can also be helpful for recent graduates or people re-entering the workplace.
  2. If you've held many jobs over a short period, a functional resume can help you avoid being pegged as a job-hopper.
  3. More and more people work in temporary and contract positions these days; a functional resume is another way to highlight the skills you used in these positions.
  4. This style lets you demonstrate how your previous work or educational experience has provided you with the appropriate background for the job you're applying for.
  5. You do not need to list your jobs in chronological order ; instead, put the most relevant one(s) first.
  6. You also do not need to list every job you have had in the career listing section; simply include the ones that are relevant.
  7. If you're applying for your first job, by all means include related internships and educational awards- if they truly relate to the job you're applying for!
  8. Include an objective statement, as it can tie the disparate resume elements together.
  9. The general layout is as follows:
    • Header with personal information (Name, Address, Phone numbers, Email).
    • Objective statement.
    • Career and skills summary.
    • Career listings, by relevancy to desired position.
    • Employment history (List all employers here, with dates of employment).
    • Educational background (School name, location and your GPA).
      • (Recent graduates may place education ahead of their career listings).

Combination Resumes

  1. A combination resume mixes the chronological, functional and skills formats .
  2. It's another format used by career-changers and those new to the job market, as you can show why you fulfill the needs of the new position.
  3. It can also be used by older workers, as this format lets you highlight your strongest credentials.
  4. The same holds true for people with employments gaps ; this style lets you focus on what you have achieved, not on times when you were not working.
  5. Make sure to write an objective statement for this format as well.
  6. The general layout is as follows:
    • Header with personal information (Name, Address, Phone numbers, Email).
    • Objective statement.
    • Career summary (if included).
    • Skills summary.
    • Reverse chronological career listing; with a focus on skills relevant to the job you're applying for.
    • Educational background (School name, location and your GPA).
      • (Recent graduates may place education ahead of their skills summary).

Video Resumes

The well-known video resume "Impossible is Nothing"
  1. Job listing sites like Jobster and Vault.com let applicants post video resumes online.
  2. Video resumes are becoming more popular, but some HR departments are reluctant to accept them, not wanting to be accused of bias. Make sure you can use your video resume before making one!
  3. Just like paper resumes, a tailored resume is best here. You want this resume to explain why you're qualified to work in a specific position or industry. An elaborate but unrelated production will not be appreciated.
  4. To make your video resume:
    • Dress as if for a job interview.
    • Speak clearly.
    • Do not make distracting motions.
  5. Begin with your first and last name. You can mention more detailed contact information, but be cautious if the video will appear on a public site.
  6. Then list your educational background.
  7. Next discuss your qualifications, either work-related or educational, for the position (or for the industry) you're applying for.
  8. You can mention any special skills you have, if they relate to the job you're applying for.
  9. End by re-stating your name and thank the watcher for her time.
  • Here's an example of what not to do in your video resume:
Video Resume Parody: Impossible is the Opposite of Possible

Step 5: Tailor Your Resume

  1. It is more and more common to have a resume tailored to each position you are applying for, instead of using a "one size fits all" model.
  2. Your resume should highlight why you are qualified for the position you're applying for.
  3. Remove extraneous information. Do not detail every job experience you have had if it does not relate to the job you're pursuing.
  4. Remember, you want your resume to be only one page (two if you have enough business experience that the extra information is important and relevant)!
  5. Applying to multiple industries and you want to list varied skills? Write different versions of your resume for each type of job. Just be careful not to send the wrong version out for a job, or you may pre-emptively disqualify yourself for that position!

Step 6: Polish Your Resume

  • Now that you've chosen a style and entered your information, it's time to polish your resume!

What Not to Have on Your Resume

  1. Always check for typos and grammatical errors. Then check again. Then have a friend proofread for you. These types of mistakes are easy to fix, and make a big difference in whether or not an employer will consider you for a job!
  2. Do not use "I" or "me"; the reader already knows the resume is about your accomplishments.
  3. In listing your education, only include college and graduate school. The fact that you won a spelling bee in first grade, though commendable, will not help you land a job interview!
  4. Remove out-of-date terms and technology. Being able to change typewriter ribbons is not a hot skill today.
  5. Unless specifically requested to do so by the job posting, do not include references on a resume. You can provide these later in the interview process.

Resume Keywords

  1. With online resume databases and thousands of resumes pouring in via email, many HR departments now perform keyword searches to weed through these submissions.
  2. This means you need to make sure your resume includes relevant keywords to the industry you're in or it may be overlooked.
  3. First, make sure you include the keywords from the job listing you're applying to!
  4. To find other appropriate keywords, study job postings for your field. Chances are the keywords you see cropping up in these ads are also what employers search for.
  5. Other sources for industry keywords:
    • Employer websites
    • Industry-affiliated websites
    • Messageboards and forums about your career sector
    • Government job descriptions like Occupational Outlook Handbook
  6. Only list keywords that apply to you.
  7. Only use words for skills you actually have.
  8. Do not load your resume with multiple keywords saying the same thing; it may help you make it through a database search, but when a human sees the keyword-loaded resume she will immediately put it in the garbage.

Resume Action Words

  1. Now examine the words you used to describe yourself and your job. Do you sound like a dynamic worker any company would be thrilled to have, or like a ho-hum employee?
  2. Action verbs like "built" and "led" are better than passive terms like "worked with" and "helped."
  3. For more verb ideas, check out Boston College's list of action verbs .
  4. Make your resume special by having it really describe who you are. Instead of generic resume words that are overused to the point of meaninglessness, use words and descriptions that are concise, easy-to-read and relate to who you are, what you've accomplished, and what you aspire to for the future. You want your resume to reflect the real you!

Resume Writing Services

  1. The online site Emurse offers an online resume-building template. After registering (for free), you can input your personal information and the site will use a template to create a resume.
  2. Microsoft Word has resume templates and a resume writing wizard you can use. You can also find more resume templates online.
    • Be careful using these, as the formatting may make it difficult for companies to electronically scan your resume.
  3. Check out books about writing resumes, like Resumes for Dummies and The Elements of Resume Style
  4. Professional resume writing services can be useful if you're stuck on what to do. Check out these professional resume writers' groups to find help.

Articles about How to Write a Resume

Have any great tips on How to Write a Resume? Post your thoughts to the discussion board or email them to Sara: sara at mahalo dot com.

Related Searches

How to Write a Cover Letter | How to Nail a Job Interview

Caffeine in Soda

National Brand Cola Caffeine (mg/12 oz)
Pepsi One
57.1
Diet Cheerwine 48.1
Tab 48.1
Cheerwine 47.5
Diet RC 47.3
Diet Coke 46.3
Diet Coke with Lime 46.3
RC Cola 45.2
Diet Vanilla Coke 44.5
Shasta Cola 42.9
Faygo Cola 41.7
Diet Cherry Pepsi 40.5
Cherry Pepsi 39.7
Pepsi 38.9
Pepsi with Lime 38.4
Diet Vanilla Pepsi 38.1
Vanilla Pepsi 37.4
Diet Coke Black Cherry Vanilla 36.8
Diet Pepsi 36.7
Diet Pepsi with Lime 36.4
Coke Zero 35.8
Coca-Cola Black Cherry Vanilla 35.1
Diet Cherry Coke 35.0
Cherry Coke 34.4
Coca-Cola C2 34.4
Diet Coke with Splenda 34.4
Coca-Cola 33.9
Coke with Lime 33.6
Vanilla Coke 33.3
Red Rock Cola 26.1
Ritz Cola 10.3

Private/Store Brand Cola Caffeine (mg/12 oz)
Big Fizz Cola 46.4
Diet version 61.9
Big K Cherry Cola  43.0
Diet version 39.9
Walgreens Cola 39.2
Diet version 45.0
 Big K Cola 38.8
Diet version 30.0
Big Gulp Cola 38.0
Diet version 30.0
Chek Vanilla Cola 36.3
Diet version 28.9
 Bubba Cola 35.4
Chek Cola 34.7
Diet version 27.5
Big K Cola with Lime  30.3
 Diet version 18.6
Clover Valley Cola 28.8
Diet version 22.9
Chek Cherry Cola 26.3
Food Lion Cola 25.3
Diet version 11.9
Laura Lynn Cola 24.4
Diet version 11.3
Superchill Cola 24.2
Diet version 34.5
Publix Cola 23.1
Diet version 35.2
Rally Cola 13.3
Diet version 13.0
Piggly Wiggly Cola 12.7
Diet version 11.9
Sam's Cola 12.7
Diet version 13.1
Publix Cherry Cola 12.4
Laura Lynn Cherry Cola 8.4
IGA Cola 4.9
Diet version 10.3
Chek Mate Diet Cola 26.2
Chek Diet Cola with Lime 45.8

"Pepper" style drinks Caffeine (mg/12 oz)
Diet Dr Pepper 44.1
Dr Pepper 42.6
Diet Dr Pepper Berries & Cream 42.0
Diet Dr. Wham 41.9
Dr. Wham 41.6
Pibb Zero 41.2
Dr Pepper Berries & Cream 41.1
Pibb Xtra 40.3
Dr. Pepper Diet Cherry Vanilla 40.1
Dr. Pepper Cherry Vanilla 39.4
Dr IGAa 59.8
Diet Dr Pop 56.8
Dr Pop 47.5
Dr K 41.2
Diet Dr K 40.7
Dr Topper 34.0
Dr Publix 31.6
Dr Bob 31.3
Mr. Pibb 31.2
Diet Dr Bob 30.9
Dr Thunder 30.6
Dr Chill 29.9
Diet Dr Thunder 29.9
Dr Chek 24.4
Diet Dr Chek 22.3
Dr Lynn 19.3
Dr Perky 18.8
Diet Dr Lynn 18.2

Other soft drinks Caffeine (mg/12 oz)
Vault Zero 74.0
Diet SunDrop 71.5
Vault Citrus 70.6
SunDrop 64.7
Diet Mountain Dew Code Red 55.4
Diet Mountain Dew 55.2
Mountain Dew 54.8
Mountain Dew Code Red 54.3
Mello Yello 49.5
Faygo Moon Mist 19.7
Chek Kountry Mist 55.1
Ramp Red 54.6
IGA Spring Mist 54.2
Publix Citrus Hite 54.1
Ramp 53.8
Mountain Chill 53.5
Chek Red Alert 53.2
Mountain Holler 53.1
Mountain Yeller 53.1
Clover Valley Citrus Drop 52.0
Sam's Mountain Lightning 46.5
Chek Diet Kountry Mist 46.3
Mountain Lion 30.9
Laura Lynn Mt. Moon Drops 27.5
Big K Citrus Drop 26.2
Big K Diet Citrus Drop 25.1
Diet Sunkist 41.5
Sunkist 40.6
Big Red 34.0
A & W Cream Soda 28.6
Barq's Root Beer 22.4

Thursday, August 30, 2007

Smoke Photography

Smoke photo by Graham JeffereyAbstract photography is nothing new, and people constantly come up with new — or re-invent old — versions of photography techniques. One of the ones that is going like wild-fire (excuse the pun) around the interwebs at the moment is the art of photographing coloured smoke.

The trend started with the highly talented Graham Jefferey, of Sensitive Light fame, whose phenomenal photographs went around the world via blogs,

We've managed to talk to Graham, and find out how he does his smoke photos…

Getting the smoke right

Before anything, Graham points out that there is no 'right' way to photograph smoke. His technique has developed over a long period of time, and Graham admits to learning and discovering new things every time he sets out to take the photos.

Smoke photo by Graham JeffereyThe two key secrets to smoke photography is inverting the image, and using gray smoke. Say what now? How does that work? Well, Graham explains: "It's quite a simple technique, really. All you need to concentrate on when you are taking the photos themselves, is getting good images of the smoke. The colours are generated digitally at a later stage."

To get the best possible smoke to work with, Graham uses simple incense sticks known as Joss sticks, which can be purchased from most Chinese supermarkets and in every Chinatown anywhere in the world. Alternatively, any reasonably large incense stick should do the trick.

Once you've got the smoke, the rest is all down to freezing the motion, and getting the lighting right. "In my opinion," explains Graham, "the key technical factor is to adequately light the smoke so that it stands out from the background."

Smoke photo by Graham JeffereyWhile smoke in itself can be an interesting subject matter, Graham points out that in his photos, the smoke itself isn't the subject matter, it is merely the tool used to create unusual photographs: "I am not trying to create pictures of smoke; I am trying to create pictures by using smoke". This approach means that you have full creative licence to do what you want to manipulate the smoke as much as necessary — the only thing you have to worry about is getting an impressive final result.

Lighting and exposure

The best way to get 'cleanly' lit smoke photos is to use a clean environment with controllable light. A studio would be ideal, but anywhere you can hang up a black background is perfectly usable. The most important thing when photographing smoke is getting enough light to freeze the motion of the smoke in mid-air. You can do this by using a lot of light (think direct sunlight falling through a window) or by using one or more flashes. When you're photographing the smoke, you'll want to make sure that no stray light hits the front of your camera lens (this will cause glare or solar-flare type effects), nor on your blackened background (because that will bring out definition in the background, which you don't want either).

Smoke photo by Graham JeffereyWhen you are photographing, it is easiest to let the smoke rise on its own volition. Instead of trying to manipulate the incense stick, try wafting some motion into the air to disturb the even plume. Alternatively, you can try to create interesting shapes by making the plume turbulent: try introducing a ruler, an upturned spoon, or a sheet of paper into the plume to alter its shape and 'feel'.

"I want clean lines and shapes", Graham explains. To do this, he shoots with a lot of light at a small aperture (and thereby a deeper depth of field). "This is very much easier to do if the smoke is allowed to rise naturally."

With the smaller aperture needed to capture the plumes of smoke properly, you obviously lose quite a bit of light. This is a problem, because in order to freeze the motion of the constantly-moving smoke, you need quite a fast shutter time. In practical terms, this means 1/250 or faster. Simultaneously, you can't reduce the ISO value on your camera either, because the purile plumes of smokes would be ruined by significant amounts of noise. Needless to say, a coinciding need of low ISO, small apertures and high apertures means that you need a vast amount of light.

Smoke photo by Graham JeffereyPersonally, my best smoke photos were taken with a 2000W Bowen studio flash light with a humongous soft-box fitted on the front. I prefer this solution because the softbox gives even lighting, but it can be difficult to limit where the light goes, so the above-mentioned limitations of "no light on your background or camera lens" can get tricky. I find that if you put the soft box really close to the smoke, you can get excellent results. Having said that, my smoke photos aren't nearly as good as Graham's, and he uses a different approach: "For all practical purposes the light used to expose the image comes from one studio flash unit fitted with a snoot and placed at the side or behind the smoke. I realise that not everyone has one of these units, but an off camera flash gun fitted with or placed beside a baffle to protect the background from direct light works just as well."

If you're going to be working with external flashes anyway, you probably need to shoot in fully manual mode: Your internal light meter is unlikely to give you a lot of joy on this one. In addition, it's absolutely vital to get it right. You'll need to set your flash output and aperture so the brightest part of the smoke is almost completely white, but not quite. Overexposure means that you will lose detail, and the inverted image will have a lot of black in the smoke, which just looks unnatural. Under-exposure, on the other hand, will make it difficult to see the difference between the smoke and the background.

Once you're taking photos, it's worth keeping in mind that you need to keep the room well-ventilated. Not because the smoke will harm you (although it probably will, if you breathe in and get enough in your eyes, etc), but, as Graham puts it: "as the air fills up with the fog of dissipated smoke your pictures will be robbed of light, contrast and sharpness" — never mind your health, think of the photos!

Digital manipulation

Smoke photo by Graham JeffereyNow that you've captured the photos, it's time to take it to your digital darkroom. Crop your image to a composition that works for you, and then use levels or curves to adjust the contrast of your photos. You'll want to make sure that the background is completely black (hold the alt key while adjusting the black-point levels slider in Photoshop, it gives you a preview of what you're actually doing), so it turns into a pure white when you invert the image.

Once you're happy with the background, invert your image, and decide if you like the black or white background best — stick with whatever you prefer, but often the white backgrounded images have a lot higher impact. If you have stray smoke, dust, or details in the background you're unhappy with, use a brush with the same colour as the background (i.e white or black) or clone tool to get rid of them.

To colourise the smoke, use the hue and saturation tool. You can apply the colour to the whole image in one go easily, because your pure white or black background will be unaffected by this tool (if it does make changes, then your background needs some work first). Alternatively, you can colorise part of the image, or use multiple colours, by making a selection of a part of the smoke, and use the 'feather selection' command to create a gradient. Using the Hue and Saturation tool now results in colorising parts of the smoke image only. Nifty, yes?

Some inspiration

Smoke photo by Graham JeffereyThe best place to go for some inspiration are Graham's own images, available on his website. My personal favourites are these: -1- -2- -3-.

Apart from Graham, there are quite a few other people who have taken smoke photography under their wing. Myla Kent's work (also inspired by Graham's images) is worth a look, and there's a Flickr group titled Artsmoke which takes the artform to a new level.

The only way you can get further, though, is to have a go yourself… What are you waiting for?

Article in co-operation with Graham Jefferey. All photographs © Graham Jefferey. To see the bigger versions, hit the Sensitive Light Smoke Gallery.


LinX:

http://sensitivelight.com/smoke2/?image=1

http://www.flickr.com/groups/artsmoke/pool/

http://photo.net/photodb/folder?folder_id=493133

http://www.flickr.com/photos/mylakent/sets/72057594095776648/

Wednesday, August 22, 2007

The Dangerous Disconnect Between Home Prices and Fundamentals

The Dangerous Disconnect Between Home Prices and Fundamentals

Jul 09, 2007 -- Today's home prices can best be described as a recession in the making, but are most often referred to as a bubble. Prices have grown so much in the last decade that they are now completely disconnected from the fundamentals that have historically ruled the real estate market. Today's prices are not sustainable and the graphs and analysis below demonstrate why.

By Ben W. (bdarbs)

The Disconnect Between Wages and Home Prices

Median income household cannot buy median priced home

Price increases are nothing new, since home values tend to go up over time. What makes this housing bubble different (besides the fact that it is the largest bubble in U.S. history) is the dangerous disconnect between home prices and the basic fundamentals that typically rule the housing market.

For example, increases in home prices typically keep pace with increases in wages. But this has not happened. National median home prices have increased by more than 45 percent in the last decade (when adjusted for inflation). Average wages per worker, on the other hand, have only increased by 10 percent in the same period.

As a result, for almost the first time ever, individuals who are making the median household income cannot afford to buy a median priced home.

In order to qualify buyers for loans, lenders loosened credit regulations and encouraged risky mortgage products like interest-only loans, negative amortization loans and ARM loans. This made it easier to get a mortgage, but admittedly much harder to keep it.

In recent years, a large portion of the buyers bought out of their price range. In many cases, their loan qualification was based on a teaser rate and/or an interest-only mortgage payment. Now that the interest rate is due to reset on these loans, millions will not be able to afford their mortgage and will likely lose their homes to foreclosure.

The Disconnect Between Rents and Home Prices

Also disconcerting is the disconnect between rents and home prices. At one point, the only thing that stopped most people from buying versus renting was lack of a down payment. Sure, it cost a little more each month to buy - but not much.

But thanks to the housing boom, everything has changed. Home price increases have far outpaced rent increases, rising 45 percent in the last ten years. In the same time period, rents, like wages, increased by only 10 percent.

Nationally, it now costs 60 percent less to rent than it does to buy. But for some reason, this hasn't stopped people from buying. Between 1995 and present day, the homeownership rate has soared. In contrast, the number of people who rent has declined for the first time since WWII.

Since we already know that rising wages and lower home prices were a factor, the increase in homeownership can be easily traced back to the lenders who loosened credit and mortgage lending restrictions. Thanks to these lenders, buyers who would have never stood a chance of getting a mortgage just a few years ago were now being approved for outrageous amounts of money.

(Of course, there is one other thing that may have encouraged people to buy during this time rather than rent: low interest rates. In a move that has been heavily criticized by some, the Fed began dropping interest rates after the bursting of the tech bubble. Low rates made it easier for people to qualify for high-priced homes, and also encouraged buyers to 'act now before it's too late'.)

See more rent vs. buy analysis here:

The Disconnect Between Home Prices and Home Sales

Although the disconnect between home prices and home sales was not present during the housing boom, it most certainly is now. The public has either lost interest or simply can't afford to buy into the current housing market. Home sales have slowed nationally, and are down significantly in cities within California, Florida, Nevada, Michigan and Ohio.

As a result, supply has now exceeded demand in most areas. It would take several months, and in some cases years, to sell all of the homes that are currently on the market. Yet, home prices are staying level for the most part - for now. If sales do not pick up soon, home prices will most definitely begin to fall.

Why is the Disconnect Between Home Prices and Fundamentals Dangerous?

Just ask Japan. The country experienced a similar housing boom in the 1980s and is still reeling from the damage caused when the bubble burst.

Almost every circumstance leading up to the Japan housing crash has been present in the U.S. during the last decade:

  • Historically low interest rates
  • Housing touted as a 'can't miss investment'
  • Average home prices doubled
  • Average home prices in the six largest cities tripled
  • Lenders offered bad loans
  • Government acted as a partner to industry
  • Home price increases far outpaced wages and rents

After reaching peak values, Japanese home prices declined by an average of 40 percent. In the country's largest cities, the declines were worse, averaging 65 percent. Homes in Tokyo lost 80 percent of their value and are still on the downward slide to this day.

Japan home prices declined by an average of 40 percent

If you are wondering what will happen in the U.S. when the disconnect between home prices and fundamentals finally becomes too much and knocks the knees out from under the housing market, take a look at the chart above.

The changes that have occurred in the U.S. housing market in the last decade aren't much different than the changes that occurred in Japan's boom market. Home prices have doubled nationally. Prices in bubble states like California--where some of largest cities are also located--have almost tripled in the last 7 years. When you compare the U.S. chart (shown below) with the Japan chart (shown above), the similarities are clearly visible.

Note: We are compiling the data for the six largest U.S. cities to also include in this graph, so the graph below currently only represents the U.S. national average home price (equivalent to the bottom pink line in the Japan graph). We expect to have the new graph up soon, so please check back.)

U.S. housing market in the last decade is very similar to Japan

When the crash occurred in Japan, prices fell to pre-boom levels. It is not at all unreasonable to think that home prices in the U.S. are about to do the same thing.

To learn more about the housing bubble and stay on top current housing market events, please read our daily housing bubble news here.

Sunday, August 12, 2007

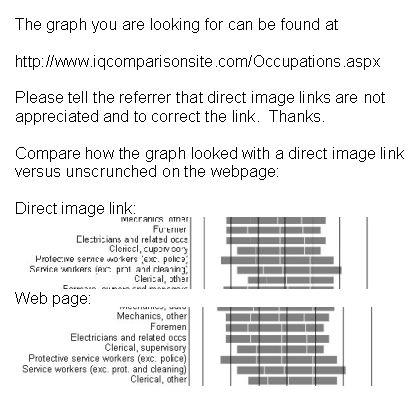
Modern IQ ranges for various occupations

Modern IQ ranges for various occupations


IQ ranges for occupations

This graph was adapted from Figure 12 of Hauser, Robert M. 2002. "Meritocracy, cognitive ability, and the sources of occupational success." CDE Working Paper 98-07 (rev). Center for Demography and Ecology, The University of Wisconsin-Madison, Madison, Wisconsin. The figure is labelled "Wisconsin Men's Henmon-Nelson IQ Distributions for 1992-94 Occupation Groups with 30 Cases or More" and is found at http://www.ssc.wisc.edu/cde/cdewp/98-07.pdf.  Used with permission.

Tuesday, August 07, 2007

National Book Festival 2007


When asked to attend the National Book Festival in Washington hosted by First Lady Laura Bush, Sharon Olds replied with the following statement...

I thought that I could try to find a way, even as your guest, with respect, to speak about my deep feeling that we should not have invaded Iraq, and to declare my belief that the wish to invade another culture and another country--with the resultant loss of life and limb for our brave soldiers, and for the noncombatants in their home terrain--did not come out of our democracy but was instead a decision made "at the top" and forced on the people by distorted language, and by untruths. I hoped to express the fear that we have begun to live in the shadows of tyranny and religious chauvinism--the opposites of the liberty, tolerance and diversity our nation aspires to.

I tried to see my way clear to attend the festival in order to bear witness--as an American who loves her country and its principles and its writing--against this undeclared and devastating war.

But I could not face the idea of breaking bread with you. I knew that if I sat down to eat with you, it would feel to me as if I were condoning what I see to be the wild, highhanded actions of the Bush Administration.

What kept coming to the fore of my mind was that I would be taking food from the hand of the First Lady who represents the Administration that unleashed this war and that wills its continuation, even to the extent of permitting "extraordinary rendition": flying people to other countries where they will be tortured for us.

So many Americans who had felt pride in our country now feel anguish and shame, for the current regime of blood, wounds and fire. I thought of the clean linens at your table, the shining knives and the flames of the candles, and I could not stomach it.

Sincerely,
SHARON OLDS