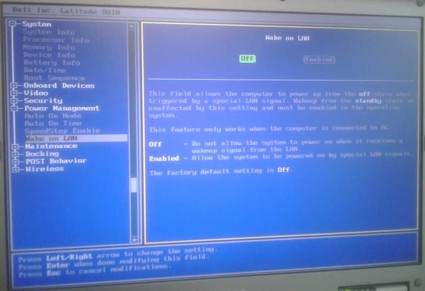
Step 1 - Enable Wake on LAN
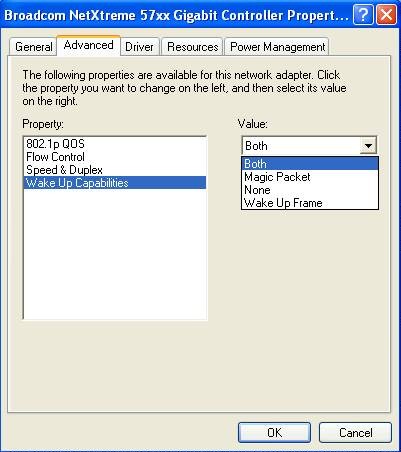
Finally, check the Advanced Properties of your network card. In Windows, go to Start-Settings-Network Connections to ensure Wake functionality is enabled. An example is shown below in Figure 3.
Figure 3: The Advanced Properties tab of the NIC properties
Step 2 - Collect your MAC address
Step 3 - Download and install softwareI use two WOL utilities, mc-wol.exe, and AMD's Magic Packet Utility. I like the AMD Utility (www.amd.com/us-en/assets/content_type/utilities/magic_pkt.exe) as it allows for creating and saving a file of target PC MAC addresses. This comes in handy, allowing you to fire up the application, open your file, grab the MAC, and power up.
Step 4 - Test your configurations!When making changes to your network, you can't be too thorough. Make one change at a time, and test each one from controlled scenarios as much as possible. Turn off your PC while at home and test WOL to watch the PC turn on!
Step 5 - Configure your routerTo send a WOL signal over the Internet to your LAN, you
need to know your Public IP. Unless you're paying extra for a static public IP, your ISP can change your public IP address whenever it wants, often when you reboot your router.
Dynamic DNS is a free and useful way to keep track of your Public IP address. If you have a Linksys or D-Link router, odds are that it has Dynamic DNS (DDNS) functionality. Both work with a free public website, www.dyndns.org. Set yourself up with a free account and you'll have a fully qualified domain name that won't change, even when your ISP changes your IP.Enable DDNS and enter your account information into your router, and your router will keep your IP tied to your new domain name. There are other Dynamic DNS services that also work.
If your router doesn't support Dynamic DNS, you can download a PC-based client from Dynamic DNS to allow a PC on your LAN to keep your public IP associated with your domain. However, your domain can't be updated if your IP changes while your computer is turned off.
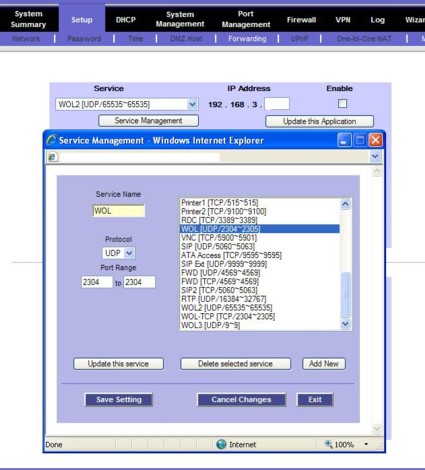
Step 6 - Configure port forwarding
Step 7 - Test again!
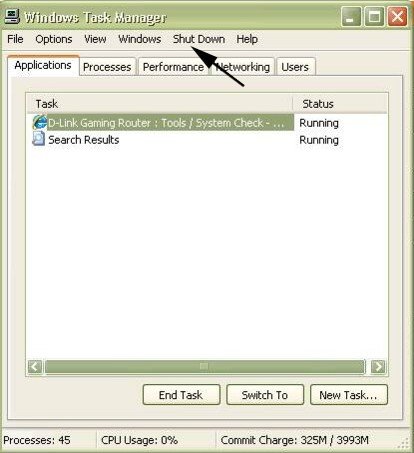
Now you've reached the moment of truth. Turn the target PC off. You can remotely turn off a Windows PC via
Remote Desktop Connection by right-clicking the menu bar and selecting Task Manager. You'll see a Shut Down option similar to Figure 9.Figure 9: The Shut Down option on the Task Manager
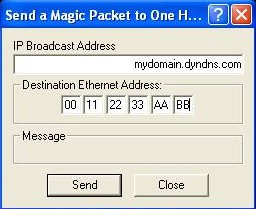
Figure 11: Sending the WOL signal
Get Clipmarks - The easiest way to email text, images and videos you find on the web.
No comments:
Post a Comment